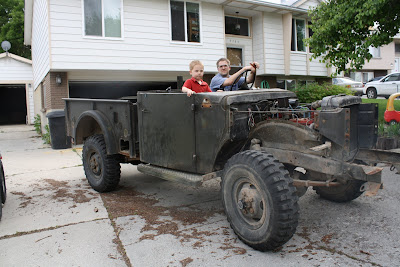
I added the final touch last month. I got the lettering and the stars on and now it's ready for a parade. But there aren't too many parades in the middle of december. So, I'll have to wait. It's for sale too, so maybe someone else will enter it into a parade before I do.
1963 Dodge M-37B1 Project
Sunday, December 16, 2012
Thursday, November 3, 2011
Thursday, June 30, 2011
Sunday, June 13, 2010
painting the hood

I've been working on the hood for quite some time. out of all the panels on the truck, the hood was the worst, so I started by working on that.

first I had to strip the hood of all of its paint, then I removed the big dents with a hammer and dolly and a stud gun. then all of the remaining dents, I covered with bondo. I sanded the bondo until it was nice and smooth.

 these are the nuts, bolts, brackets and hinges that go on the hood. I sand blasted them to get the old paint off.
 Sunday, June 21, 2009
Utah Lake Excursion

This is My friend Wolf's Rig pulling his trailer and his M-37 ontop and my M-37 being pulled behind. Wolf's friend Aaron came with his M-37 too.

This is Wolf's rig about to come down a fairly steep hill. We just put it in 4-low in first gear and let the engine take us down the hill. there was a ledge near the top that you just had to fall off and hope for the best. it felt at times that the truck was going to flip over, but then the back wheels would hit the ground and you were fine. http://www.youtube.com/watch?v=ISELsrsW55I
http://www.youtube.com/watch?v=L_5g9ZDw6Co

We stopped here after the Hill descent to grab a snack and rest up. you can see our tracks in the grass on the hill where we came down.

We picked up some stow-aways on our way down the slope.
 Aaron was going to run over a dead tree, but at the last minute he stopped. he backed up and went around and later looked at his radiator. he discovered that a branch had poked through and came close to puncturing his radiator.
 Me on the left, Aaron in the middle, Wolf on the right.
 Here's some more videos from our trip:
http://www.youtube.com/watch?v=3ksnXPxgdnk
http://www.youtube.com/watch?v=3ksnXPxgdnk
Saturday, May 23, 2009
 Jennifer pleaded for me to install seatbelts, so I took a trip to the junkyard and got a few things I needed.
  At the junkyard, I picked up the seatbelts out of a van. and found this rear view mirror in a mail Jeep.
  I made this shifter knob out of a 3/4 in. socket. I welded a nut into the socket and welded a bolt onto the end of the shifter. I took the socket and covered it in epoxy clay, then stuck it on the end of a drill and spun it real fast while applying sandpaper and it smoothed it right out. I think it turned out pretty good.
I finally got my blinkers working. I hooked the switch up to a flasher and to the battery and also to the turn signal lights. It all works great now.
Subscribe to:
Posts (Atom)


